Designing Grooves
Songzap completely reimagines drum programming. In this video, RT60’s Stereo Mike demonstrates all of its intelligent features and makes a song on the fly – dropping some raps, and recording piano and double bass inspired by the beats made!
Groove Features
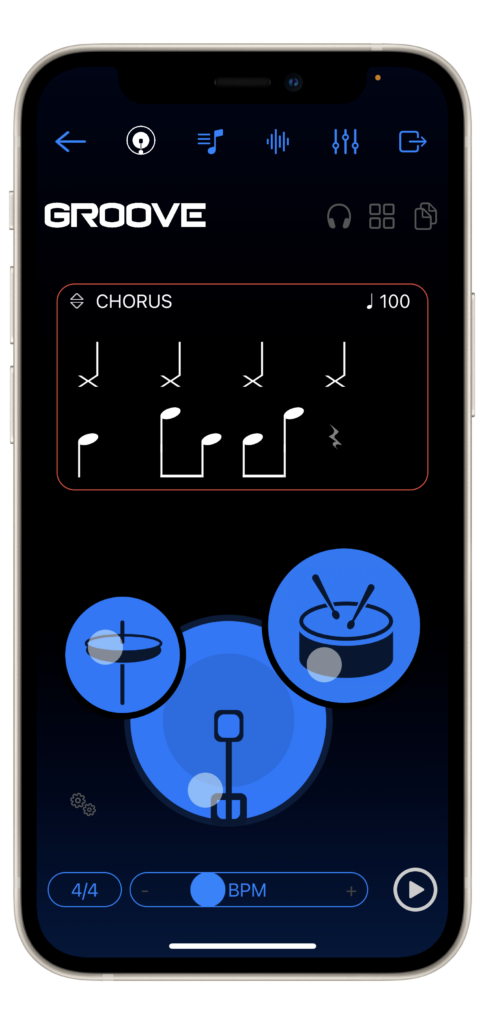
The Groove Designer is an intelligent, AI-powered groove generator which you can intuitively control via a tactile interface. Drag and move the control dots representing the kick drum, snare drum, and hi-hat cymbal and you will instantly generate multiple rhythmic variations for each of these sounds. The interface is musically intelligent, so wherever you position the controllers, the app will always generate viable drum grooves that can help you develop your song ideas.
You can move the control dots in any direction over the kick and snare drum interfaces, and horizontally across the hi-hat interface. After some time experimenting with the AI Groove Designer, you might notice that moving the kick and snare controllers horizontally adjusts the on-beat notes that are in the developed groove pattern. Moving the kick and snare controllers vertically modifies the off-beat (or syncopated) elements of the pattern. This can be really useful if you are trying to develop the intensity of a groove, for example in a chorus section of a song; in this instance you may want the core beat to stay similar, but introduce extra syncopated notes to the pattern in order to add more energy or intensity. Usefully, to aid this, single-tapping on the kick or snare control dots will lock the travel direction to vertical-only or horizontal-only, for extra precision. You will soon acquire an expectation of the rhythmic variety your moves are creating.
The notation screen above the Groove Designer pads provides an instant representation of the drum patterns you are creating in real time. This is not only useful as a notation and learning tool (yes, it is a great way of actively learning drum notation!), but the notation display also doubles up as a direct editing area, where you can click to create new or delete existing drum notes! One of the best ways to create exciting but precise patterns, is to move around the pads until you get close to an imagined groove, then perfect your pattern by clicking within the notation screen area.

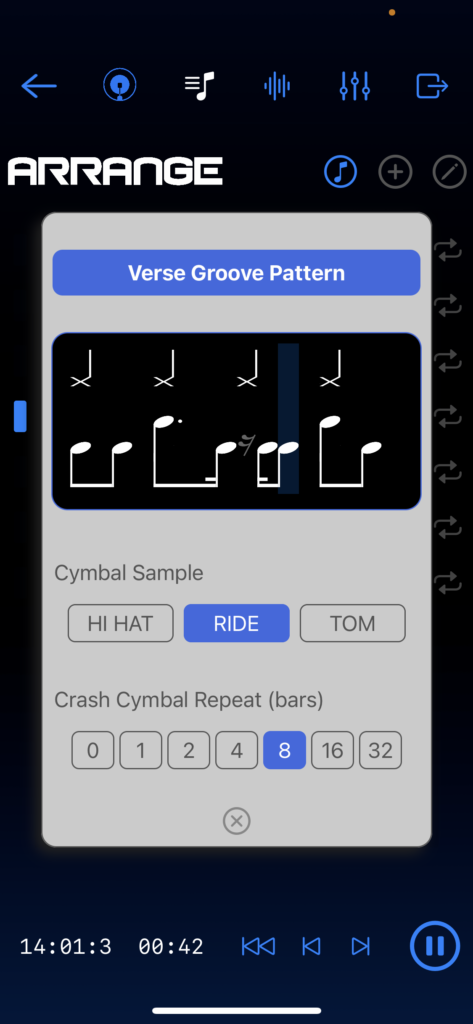
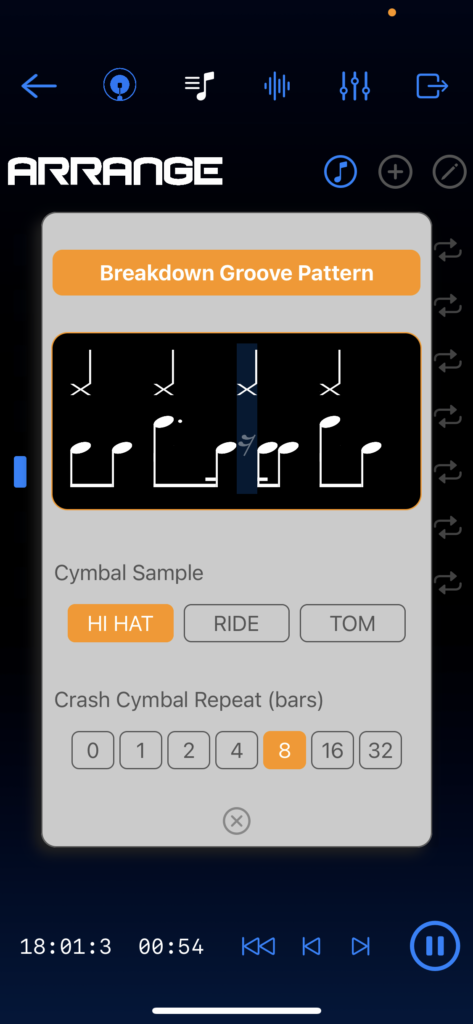
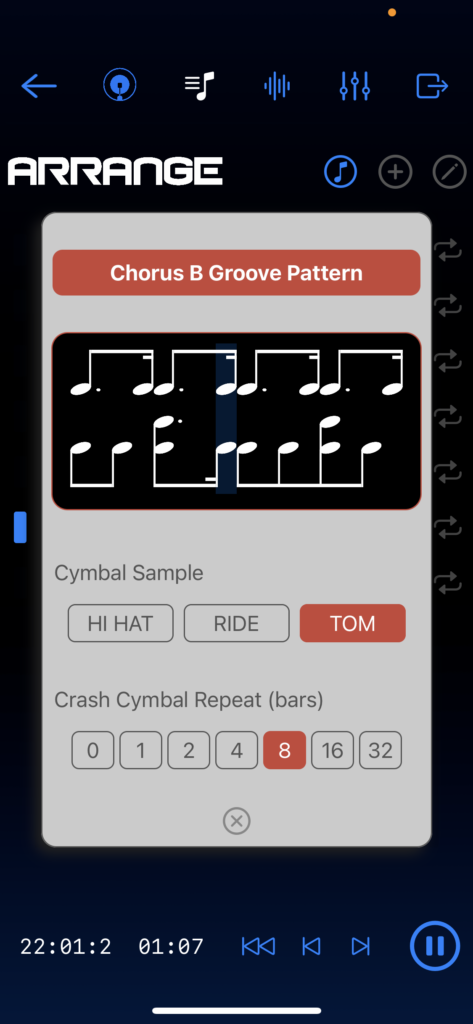
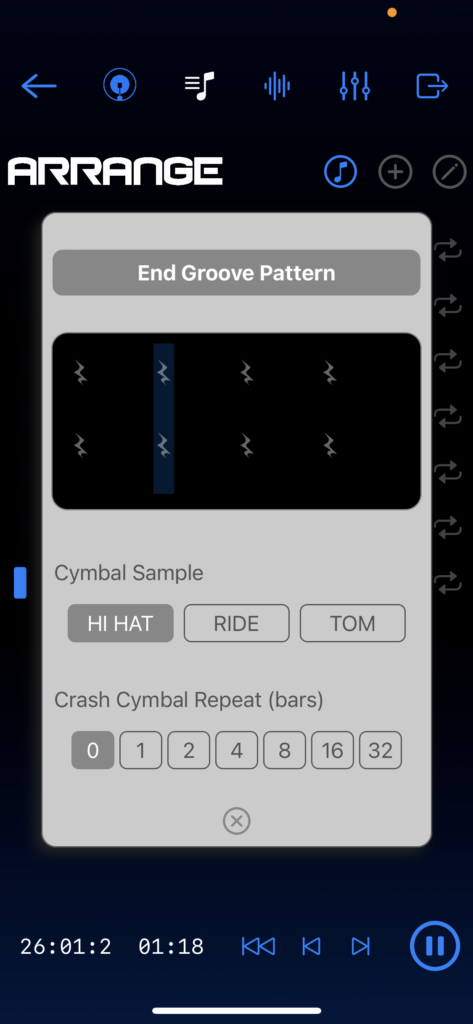
Adjusting the cymbal control dot runs through a few commonly used cymbal patterns; on-beat quarters, off-beat quarters, eighths, and sixteenths. A particularly good way to develop a demo song is by simply changing the cymbal pattern of the beat during different sections of the song. Additionally, you can switch the hi-hat sound to a ride cymbal or floor tom from the Cymbal Settings button situated below the hi-hat area – which is also useful if you want to easily create patterns that signify alternative sections in your song’s arrangement. The Cymbal Settings popup menu allows you to add a crash cymbal on the “one” of a chosen cycle duration, which you can adjust from none to 32 bars of length. The Crash Cymbal Repeat cycle therefore dictates how often the crash plays: for example, in a 16-bar verse section you may want the crash to only sound at the start, whereas with a chorus section you may want to hear the crash cymbal every two bars to add extra energy and drive.
You’ll notice that you can also select between three different musical time-signatures. Whilst the majority of popular music is written in 4/4 (called common time), it is also possible to use 3/4 and 12/8 time signatures in Songzap. The 3/4 time signature is often referred to as a ‘waltz’ because it aligns with the emphasis of the traditional waltz dance steps, but that doesn’t mean you can’t experiment and create some novel and inspiring hip-hop beats in 3/4! Perhaps more commonly used in popular music is 12/8 time, which essentially relates to using 4 beats per bar (as with 4/4 timing), but counting 3 triplet-eighth sub-divisions per beat rather than 4 sixteenths per beat. Songwriting in triplets is quite common in popular music, and you’ll find that writing in 12/8 pushes you to take a slightly different approach to your timing and performance, which can only be a good thing in the process of creative practice!
Arrangement Mapping
You can use the Groove Designer as a singular pattern generator (a kind of ‘groove buddy’ application) that will simply provide you with a beat to jam to, inspire riffs, or become the backbone to a rap verse or freestyle. This is perhaps the most basic use of the Groove Designer feature, and there is nothing wrong with using it purely in this fashion. You will soon find that the rhythmic pattern you are working with inspires particular instrumental parts or vocal phrasing (e.g. a syncopated guitar or piano rhythm part, a bass line locked to the kick drum pattern, or a double-time rap tied to 808 hi-hats). There are styles of music that work well with little variation around one main rhythmic idea. If this is your jam, save it as a song, and you can always copy it to experiment with variations later.
However, you may benefit from creating adjustments to your main beat, to inspire variations in your performance and writing. A simple change, such as switching the hi-hat to a ride cymbal sound, can signify a chorus or bridge section, while spacing out or increasing the complexity of kick and snare hits, can really trigger significant phrasing variations in your playing.
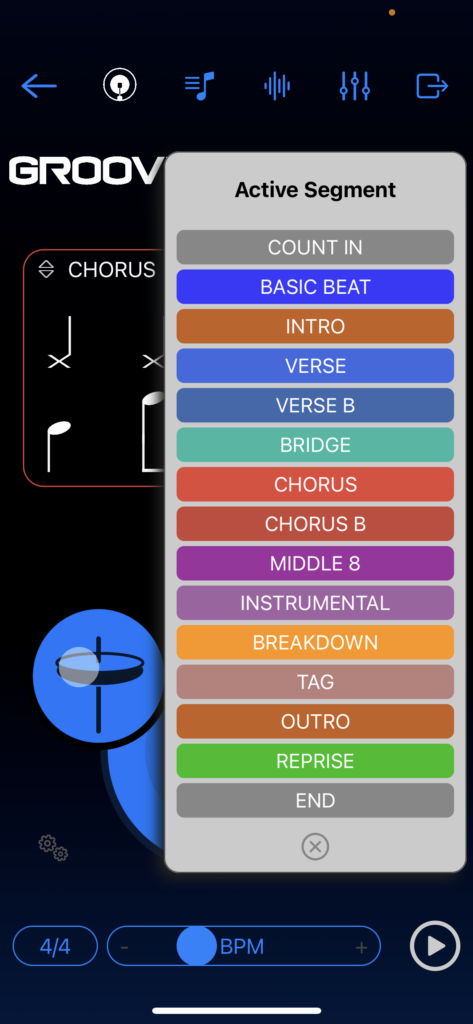
You can map the altered patterns you are creating to different sections of an arrangement from the top left of the notation screen, which we also refer to sometimes as song ‘segments’. Clicking on the pattern’s name in the notation window (e.g. “Basic Beat” or “Verse”), opens the Active Segment popup menu, from which you can select a different song segment to work on (e.g. count in, intro, verse, bridge, chorus, etc.). This way, you can prepare a series of patterns that you can call upon as you later build up your song structure. You can also copy patterns from other song sections, by accessing the Copy button from the top-right corner above the notation screen. From the Copy popup menu, you can then select all the segments which you’d like to copy the current drum groove to. This can be a great way to maintain some consistency across your arrangement, whilst altering the drum patterns just enough for your newly envisioned sections.
For a full walk-through of Songzap’s Arrange features click here.
Selecting Drum Kits and Preset Beats
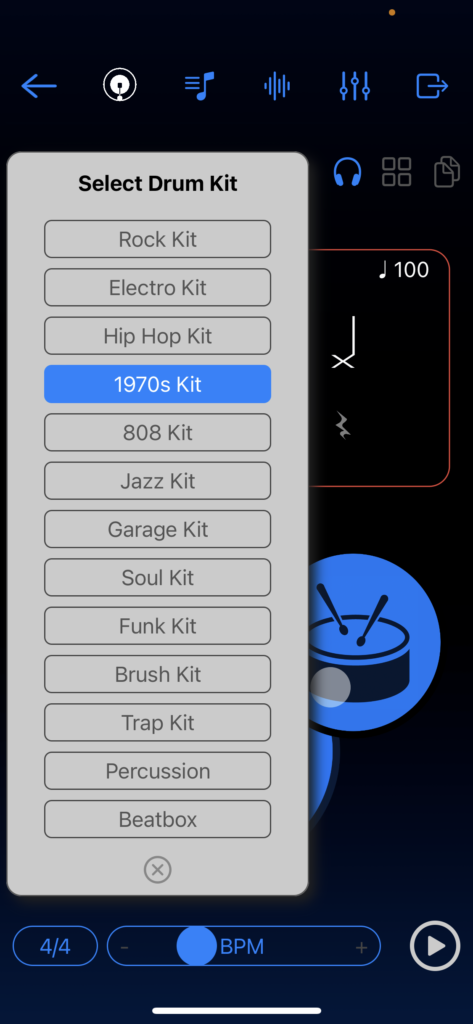
Starting with the right Drum Kit for your intended musical genre is a no-brainer and hence, here at Songzap headquarters, we have spent lots of energy recording a range of original drum sources to kick-off your productions in style. Using a selection of classic drum machines, modern and vintage kits, microphones, and pre-amps we have recorded a variety of acoustic and electronic sources to help inspire and facilitate your music-making.
Select your preferred Drum Kit from the Kit Select popup menu (accessed by the headphone icon button above the notation screen) and check out the library of kits we have created – ranging from Rock to Hip Hop, hard-hitting analogue subs to soft brush kits, and covering a variety of eras and styles. You can leave a pattern playing while you preview the sounds of the kits, although you may enjoy generating grooves specifically inspired by your drum kit selection.
You can also select one of 25 preset beat patterns from the Preset Beats popup menu, activated by the Presets button, situated between the Copy and Headphone buttons above the notation screen. These cover classic patterns from multiple genres, and can be great starting points for your groove generation, especially if you are new to drum programming. Remember, it is easy to quickly alter them to your taste either by clicking within the notation screen, or by touching and moving around the Groove Designer interfaces, so use the presets as a starting point, and then tailor the grooves to your own style and preference for the song you are working on. You’ll also find the presets offer a great source of inspiration for finding new rhythms or approaches to your songs. If you are a guitarist, the beat you choose to play to may influence the strumming pattern you use and hence might push you into new creative areas. Tempo can have a huge influence too, so experiment with the full range available – a simple drum beat, such as preset pattern A, can sound like heavy rock when played at 90 or 100 bpm, and more like drum-and-bass at 180 bpm.
Song Playback in Groove Designer
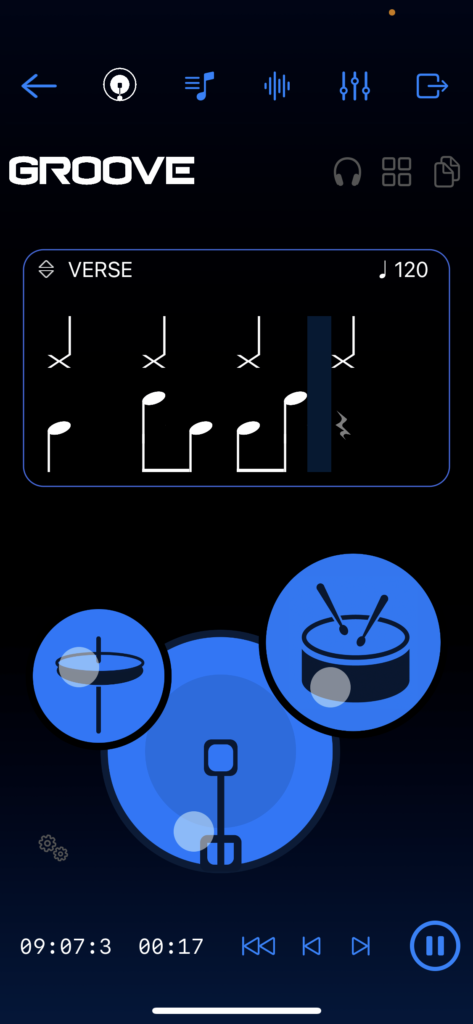
When you press play in the Groove Designer, the groove segment which you have selected will always play back, regardless of whether you have a more complex arrangement laid out in the app’s Arrange section. This is to allow continuous experimentation. If you have already recorded some tracks in your song, you can then try out a number of different grooves while the song plays along, without disrupting the arrangement which you might have put together. If you leave the Groove page whilst the song is playing, then the playback will revert to using the grooves as arranged and structured in the Arrangement section of Songzap.
You’ll also notice that it’s not possible to change the song tempo (BPM) or time signature after you have made some recordings. This is because having recorded your performance to a specified BPM, if you then change the underlying tempo, your prior recordings will become terribly out of time with the new drum beat. So, you can only adjust the song BPM and time signature before recordings have been made; after the first recording has been made, the playback display reverts to the standard playback buttons and song bar/time counters as seen on the Arrange, Tracking, Mixer and Export pages of the app.
Groove Jam (Demo)