Tracking Features
The Tracking feature in Songzap is an advanced multitrack recorder, turning your phone into a powerful and portable song-capturing system!
The iPhone microphone is an exceptionally accurate mic, which can pick up very high quality sound recordings (the core function of a telephone is sound capture and reproduction after all!) With Songzap and your phone, you can therefore record your voice and musical instruments, layer ideas, import pre-recorded audio files, and bounce down recordings to backing layers so you can keep on recording further performances – everything you need to make a high quality song recording. Of course, we recommend using a proper recording studio and some fancy expensive microphones for making professional release recordings, but you’ll be amazed at just how good a result you can achieve with Songzap and the iPhone mic. The recordings you capture will be more than sufficient to facilitate a creative songwriting process, capturing your artistic ideas and producing demo songs that can be taken forwards to a studio production. You’ll find these recordings help you communicate your ideas with band members, a producer, or manager too – all of these tasks collectively represent the process of ‘pre-production’, which is why we refer to Songzap as a ‘preproduction and songwriting studio’ that’s specifically designed for musicians, songwriters, producers, and MCs!
Tracking with Songzap
The term ‘Tracking’ came about back in the days of analogue tape recorder machines, which captured sound and music onto aligned tracks built into the analogue tape itself. Nowadays we often use tracking and recording interchangeably, though we prefer to use the term tracking with Songzap because it can also incorporate concepts of importing or bouncing audio tracks in a project as well as direct recording – all features which Songzap is capable of!
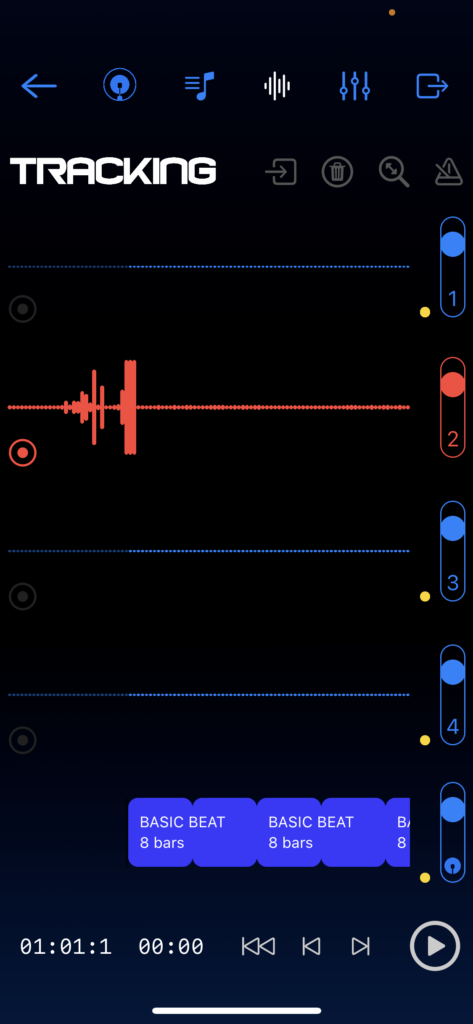
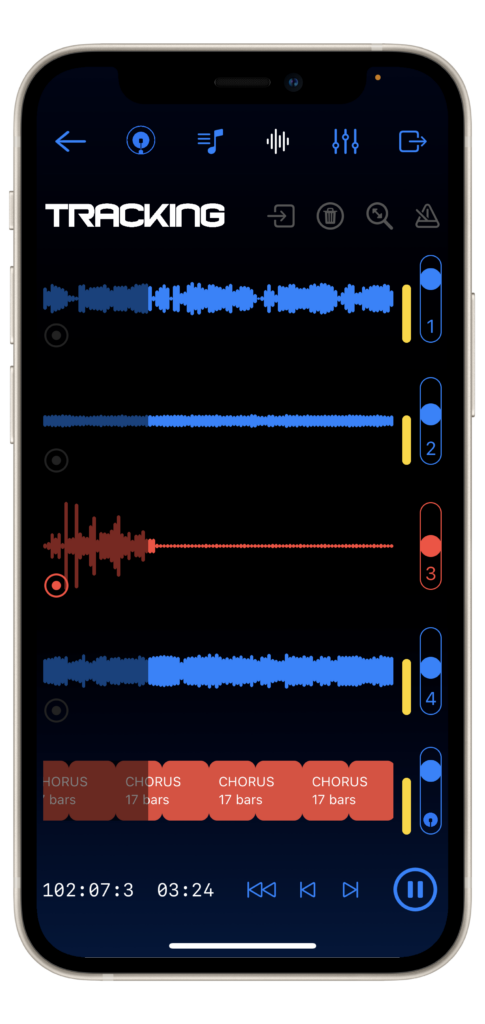
Looking at the four tracks in Songzap, you’ll see each has a circular Record button: tap on it to record a take over your beat patterns, or other pre-recorded ideas. When recording is enabled, the track will go red and you’ll see the waveform showing you the immediate sounds which the microphone is capturing. When the recording is enabled, you’ll start to record audio onto the selected track as soon as you press the Play button. Beware, you will record over whatever other audio is already on the selected track, so think carefully about what you are recording and which track you should record to. If you want to practice before recording, you can hold down the record button until the track turns orange, indicating that the track is set to ‘Input Monitoring’. All this means is that the track is fully setup to record and capture audio (and you’ll hear the live captured microphone audio in your headphones too), but no actual recordings will take place until you revert to the Record Enabled (red) mode by tapping the Record button again. With a track set to Input Monitoring, you can therefore practice performing until you are ready to do a recorded performance take.
The Tracking page is linked to the Mixer (and all other pages in Songzap), and this is why to the right of each track, you have access to volume faders for each channel. This provides you with handy control over the volumes of your tracks, so you can create a comfortable monitoring balance while you record new tracks. If a track is set to Record or Input Monitoring, then the fader of that track will adjust the volume of live microphone audio that you hear back in your headphones.
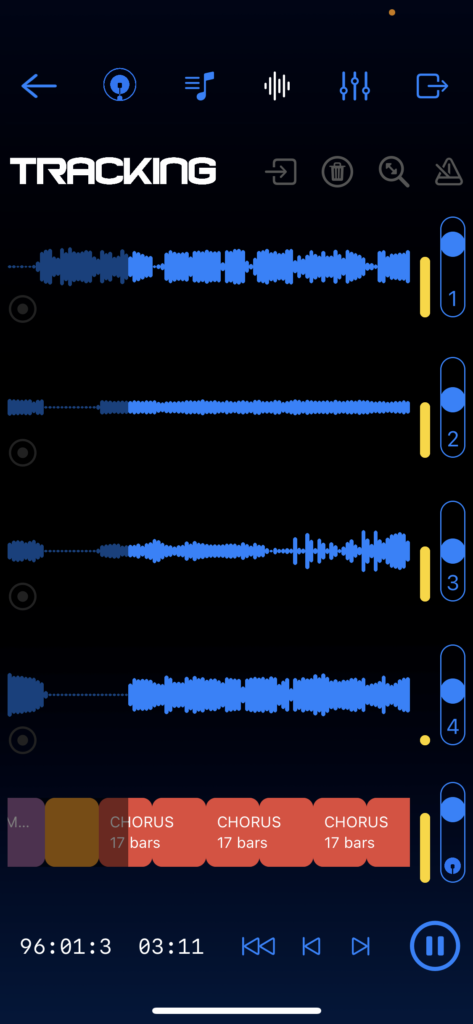
The fifth track at the bottom of the Tracking environment represents a sub-mix of all your drum elements, corresponding to your active groove patterns. You can see which drum pattern is playing by the Arrange blocks scrolling across this track, in place of the recorded waveforms of tracks 1-4 (if you haven’t created any arrangement sections in your song, you will only see the Basic Beat pattern represented here).
Should you wish to control your mix’s elements in more detail, simply click on the Mixer button from this page’s top-level menu, and you can return to the Tracking page after you have further refined your monitoring mix (for example, added reverb, balanced your individual drum layers, or panned your tracks in stereo).
For a full walk-through of Mixer features click here.
We, of course, recommend using wired headphones when you track, not only so you can enjoy performing within the “world” of your developing song, but so you can also avoid extraneous noises from your environment distracting you, or bleed from your previous recordings and drum tracks blasting out of your phone’s speaker. Without using headphones, bleed – or leakage, as is referred to in studio parlance – will be recorded at a low level alongside your new performances, creating unwanted artefacts and reducing the quality of your overall productions.
Note that for all pro-audio and recording studio situations, you should avoid using Bluetooth headphones, which induce unmeasurable and variable time delays affecting the accuracy of your performance. For this reason, Songzap only allows Bluetooth headphones for listening back to your songs, and wired headphones must be used for recording.
To get a feel of the Tracking functionality even before you have created your own song, you can load ‘Ready To Go’ – the demo song lovingly made by the Songzap developers. This will give you a chance to familiarise yourself with the Tracking environment before you deep dive into recording your own performances. Here are a few things you can explore and try out:
- Use your finger to scroll across the arrangement
- review the size and shape of the waveforms over the course of the song and as you change track volumes
- turn the click-track on and off using the Metronome button (top-right of the Tracking page);
- zoom out and back in to the full song structure using the Zoom button (to the left of the Metronome button);
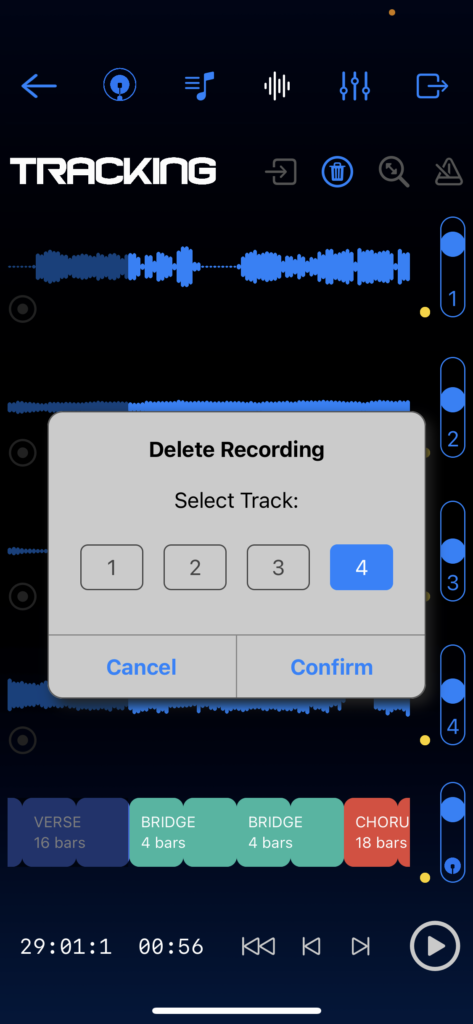
- and when you’re ready, delete a track using the Trash button (to the left of the Zoom button), to begin jamming and recording your own ideas along to our song.
In the Tracking page, you can also scroll to a particular point in your song to drop in and record from a specific position (for example, at the start of a verse, bridge, chorus, or instrumental section), correct any mistakes, or develop, for instance, your top line as and when you are ready.
Importing and Bouncing Tracks
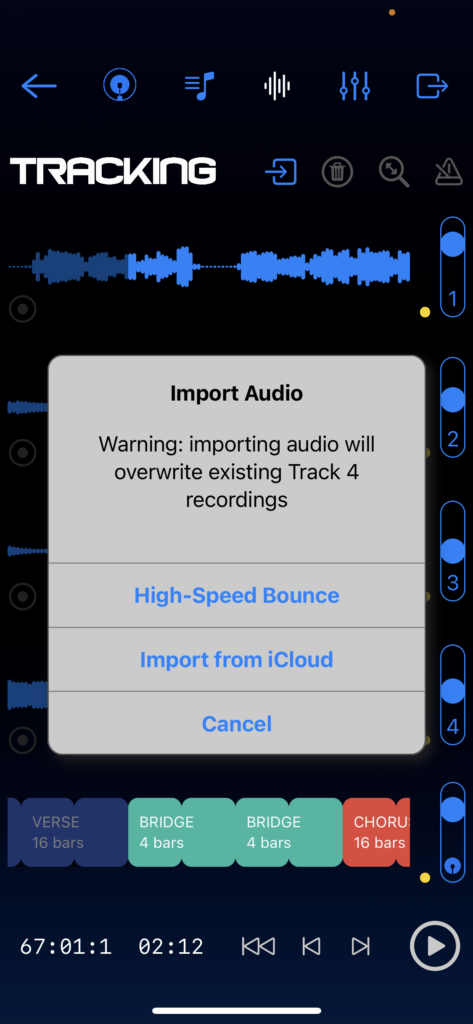
Songzap includes two significant and well-used studio production technologies: importing and bouncing tracks. Songzap reserves Track 4 for the location of where any imported or bounced tracks reside, and you can import audio by tapping the Import button to the left of the Trash button.
The two import options are described in a little more detail as follows:
High-speed bouncing is a technique that creates a full stereo mix of your tracks and then imports that mix back into the project (on Track 4). So if you want to, you can turn your mix into a ‘sub-mix’ and then continue recording on the tracks you have freed up. The high speed bounce creates a mix of whatever you can hear at the time of activation – so if you don’t want to bounce the drums into Track 4, then make sure the volume of each drum track is all the way down before you start the bounce. The bounce essentially plays the song in the background at very high speed, recording its own mixed audio stream, and converting it back into an imported audio file.
You can also directly import a stereo audio file into Track 4 from an iCloud location. If you select this option, Songzap will ask you to show it which audio file in your iCloud folder you would like to import. This is really useful if you want to add extra layers over some previously recorded music, or if you want to practice singing or rapping over an instrumental track that you produced outside of Songzap.
These are powerful features that turn Songzap’s four-track recorder effectively into an unlimited tracking powerhouse, enabling you to create complex and multi-layered songs and arrangements (‘Bohemian Rhapsody’ anyone?)
