Arrange
The Arrange page in Songzap provides you with a comprehensive tool to create, structure, organise, loop, and manipulate the duration of song sections.
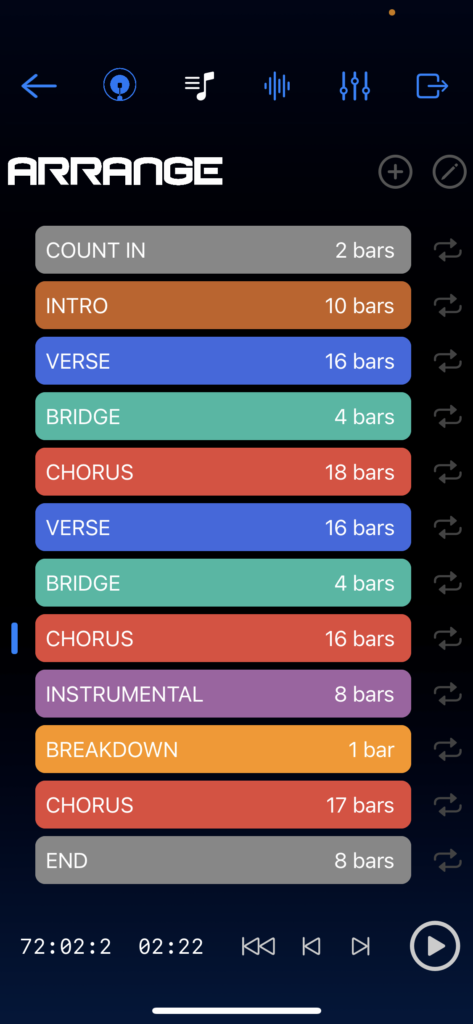
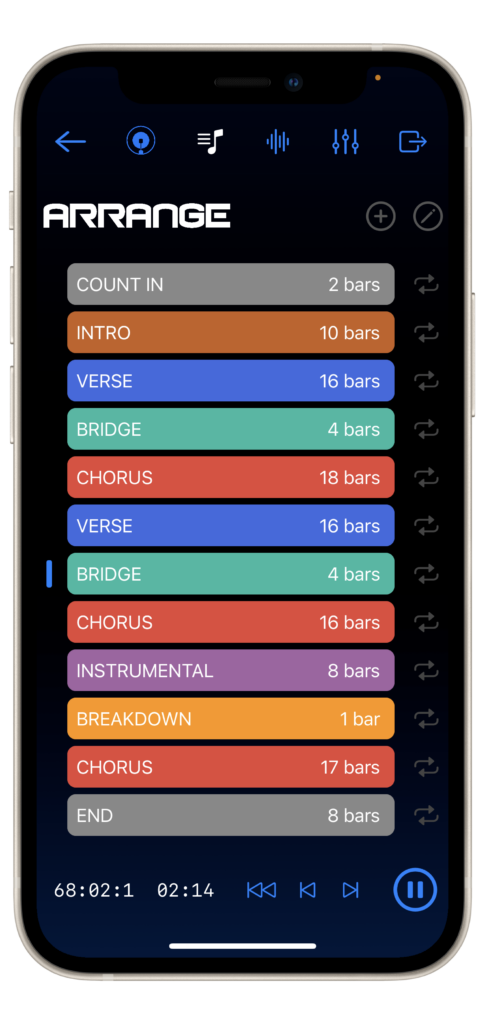
Initially you’ll see the Arrange page in its default mode, most likely with a few song segments already in place. Each segment defines a type and length of musical section in your song, allowing you to build up simple or complex song structures that include: verses, choruses, instrumentals, bridge sections, and more; a count in is included too so you can prepare for whenever you want to practice performing your song. The arrangement can be designed and modified in a number of different ways, which are all described below.
You can add new sections to the song by tapping the Plus button to the right of the Arrangement title text, towards the top of the page. This will create new sections at the end of the structure, which are identical to the final section in your song (you may want to scroll all the way down to the bottom of a longer arrangement to see them!) Of course, you will not want every section to be the same, so you can then go about re-defining the type and length of each segment to create the song structure that suits your song.
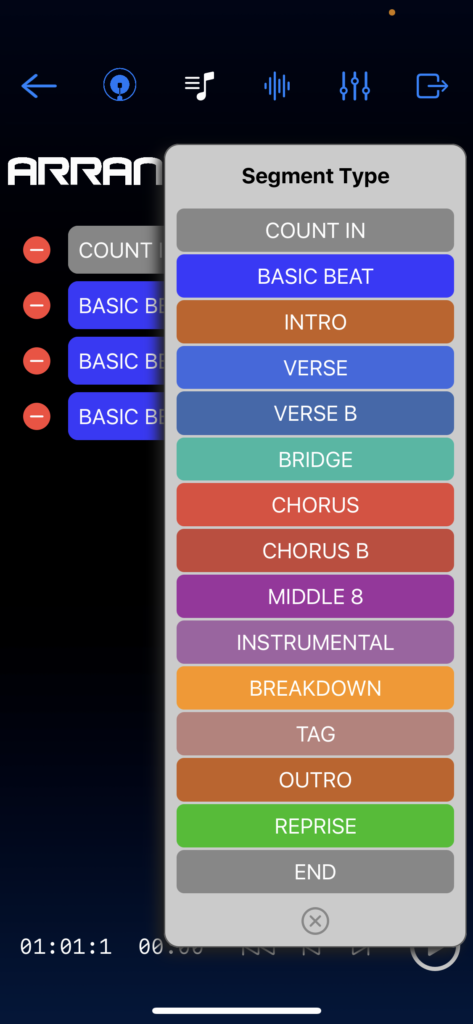
Clicking on the name of a segment opens the Segment Type popup menu, where you can select from a palette of pre-defined and commonly used song section types (Count In, Basic Beat, Intro, Verse, Verse B, Bridge, Chorus, Chorus B, Middle 8, Instrumental, Breakdown, Tag, Outro, Reprise, and End*). The segments are all colour-coded to help you easily distinguish them when looking over the arrangement.
*useful for that final cymbal hit or a section of silence after your outro!
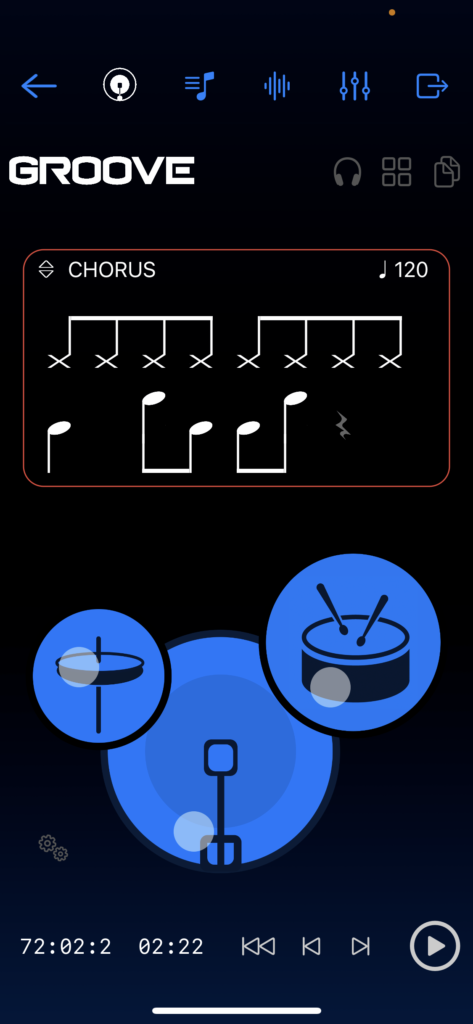
Note that the colour of an Arrange segment will match the Groove Designer’s notation screen border, informing you of the Groove/Arrange correspondence at all times; this way, you’ll start to grasp the connection between the Groove Designer and the Arrangement pages as you move between them. The different segments you choose therefore enable you to place different groove patterns (drum beats) at corresponding sections of the song. Used with some creative thought, this enables you to map out a powerful computerised drum track for your whole song.
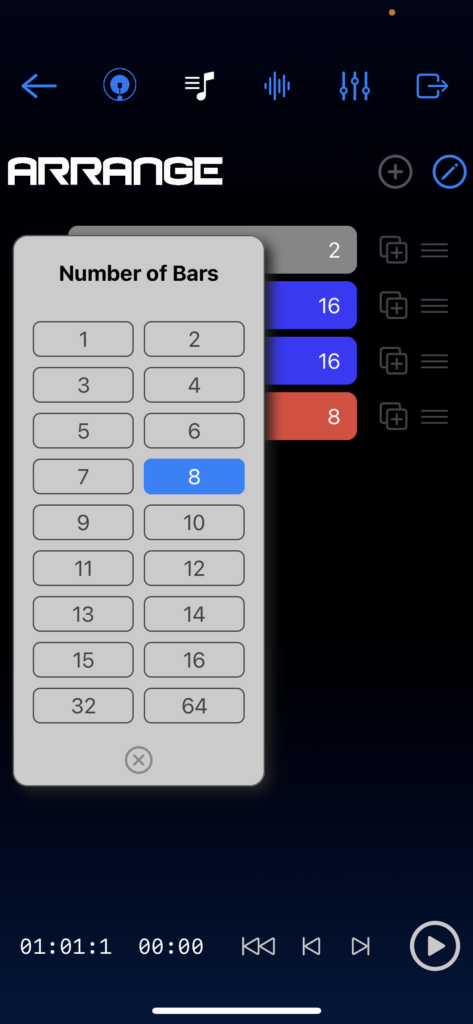
Clicking on the bar length area of a segment opens the Number of Bars popup menu, from where you can select a duration from 1 to 64 bars for the chosen section. Often, song sections come in quantities of four, eight, or sixteen bars, purely because this sounds good in many common musical styles. But it’s sometimes good to mix up the number of bars in song sections too, providing an extra creative dimension and a sense of uniqueness to a song. A one-bar pause or a three-bar bridge can sound great in the right context, and the Arrangement page allows you to experiment quickly and easily with these types of artistic choices when songwriting. Note that if you want to create a single segment of, for example, 21 bars, you can achieve this by having two consecutive similar segments with durations of 16 bars and 5 bars respectively.
Arrangement Edit Mode
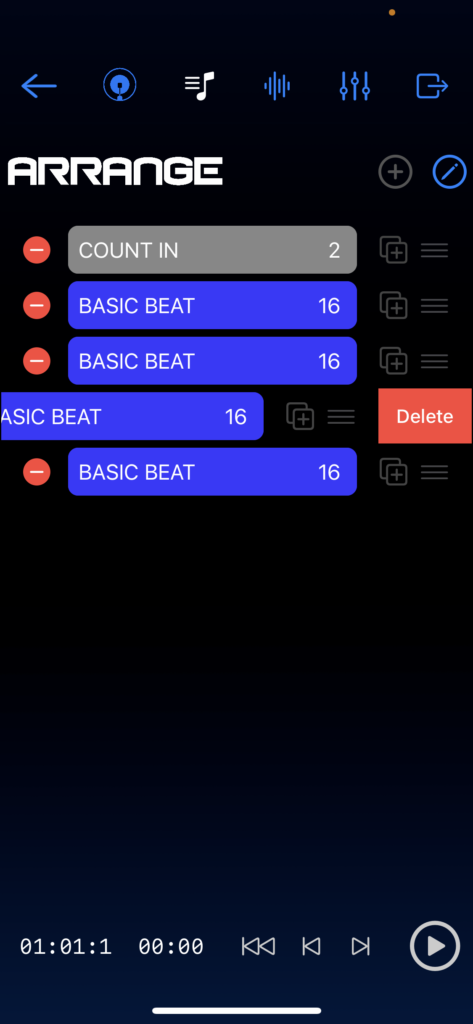
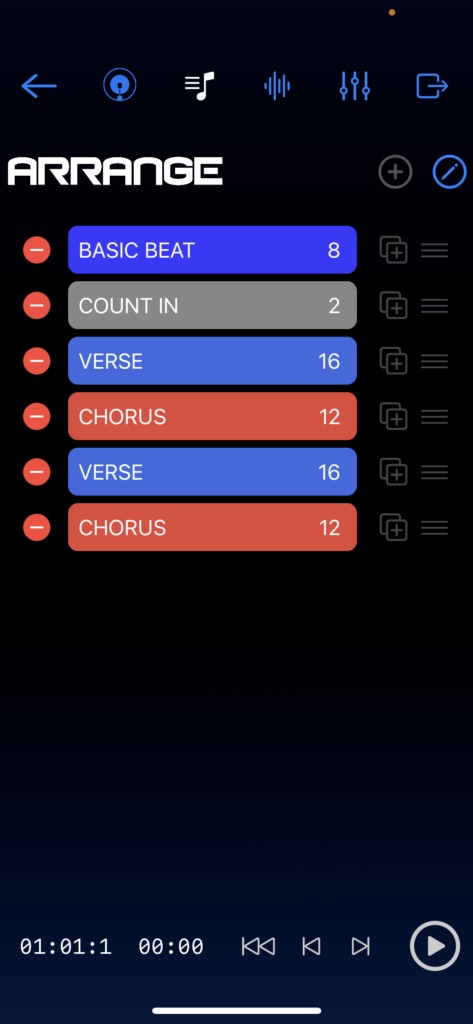
It’s valuable to be able to quickly change your arrangement and move segments around, so you don’t get too bogged down in the technical process and stay focused on your creativity. For this reason, the Arrangement page has an Edit Mode to allow you to duplicate, move and delete segments. To activate the arrangement’s Edit Mode, click on the Pencil (Edit) button at the top right of the Arrange page. In edit Mode you will be able to perform the following actions:
- Move segments with a simple drag-and-drop gesture, implemented by touching the Move button (horizontal lines) corresponding to the segment you wish to move.
- Duplicate segments by pressing the boxed plus (+) button on the corresponding segment. If you want to duplicate a segment to be used later in the song (for example a second verse which is identical to the first), it’s easy therefore to duplicate the first verse and then move the duplicated segment to the correct position in your song.
- Delete segments that you no longer require by pressing the red delete sign on the left of the corresponding segment. After pressing delete once, you will then need to press the delete confirmation button, which appears to the right-hand side of the screen. Don’t worry if you delete a segment and then change your mind, it’s really easy to create a new segment, reconfigure, and move it back to the correct place!
Once you’ve finished using Edit Mode, press the Edit Mode button again to return to the Arrangement’s default view, ready for playing back your crafted groove structure.
Playing and Navigating the Song Arrangement
When playing back the song from the Arrangement page, you’ll always see the blue bar (which we call a ‘Playhead Indicator’) on the left side of the screen. You can therefore quickly see which song section is playing at any moment in time. You’ll notice that the Playhead Indicator moves around the song in response to you pressing the Play, Skip Backwards, Skip Forwards, and Return to Start buttons found in Songzap’s Playback Controller at the bottom of the screen. You’ll also see that the Bar, Segment, and Beat counters in the bottom left also update accordingly as you navigate to different sections of the song.
On the right-hand screen are a number of Loop buttons, enabling you to loop particular sections of the song (which can be useful for repeatedly practicing singing a chorus or trying to find the perfect guitar solo for an instrumental section). Clicking on the Loop buttons of one or more consecutive sections will put the song in Loop Mode, represented by green transport buttons at the bottom. This way, you always know if Loop Mode is active, because the Playback buttons will be green, rather than the usual blue colour (representing normal, linear playback).
Note that when playing back in Loop Mode, it is still possible to skip in and out of the loop segments by using the Skip Backwards/Forwards button. If you press Play or Return to Start when Loop Mode is active, the playback will always start at the position of the first segment, which has Loop Mode selected.
Should you switch to the Groove page while playing back in Loop Mode, the play/pause transport button at the bottom of the page will remain green to indicate that the song is looping one or more sections. The notation screen will display the groove pattern corresponding to the current section, which you can however edit (using the Groove Designer’s control dots or by editing directly within the notation screen).
This function is quite a powerful remix tool, enabling you to hear specific sections of your song with alternative drum patterns! Even if you cancel Loop Mode and your song moves on beyond the currently modified groove segment, the beat pattern you are working on will not be dismissed, allowing you to keep experimenting until you return to the Arrange page, and the arrangement moves on to the next segment – at which point the expected Groove/Arrange correspondence will be recovered (for more on Groove/Arrange mapping click here).
